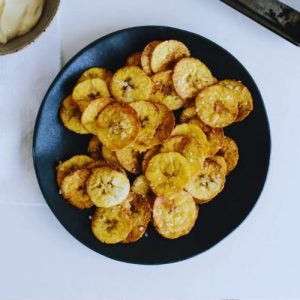
Baked Plantain Chips
Golden and crunchy baked plantain chips made with just a few simple ingredients. Naturally gluten-free and low in saturated fat, these chips are a healthy snack or side that’s quick to prepare and oven-baked for a guilt-free crunch.
Equipment
- 1 mandoline slicer (for thin, even slices)
- 1 baking tray
- Parchment paper (enough to line baking tray)
- Mixing bowl (medium size)
- Small knife
Ingredients
- 1 green plantain
- ½ tablespoon avocado oil
- Sea salt to taste
Instructions
- Preheat the Oven: Begin by preheating your oven to 350°F (175°C). Ensuring your oven reaches the proper temperature before you bake is crucial for achieving evenly cooked, golden, and crispy plantain chips. Line a baking tray with parchment paper while the oven preheats—this prevents sticking and ensures easy cleanup.
- Prepare the Plantain: Take one firm, green plantain and rinse it under cold water to remove any dirt or residue. Using a small, sharp knife, carefully make three to four lengthwise slits along the skin of the plantain. Be cautious to cut only through the peel, not the flesh, so that peeling is easy. Once the slits are made, gently remove the peel to reveal the pale, firm plantain inside.
- Slice the Plantain: Using a mandoline slicer set to the thinnest setting, carefully slice the plantain into even, paper-thin rounds or diagonal slices—whichever shape you prefer. A mandoline helps create consistent slices that bake evenly and crisp up nicely. Tip: Always use the hand guard for safety, as mandolines are extremely sharp.
- Coat with Oil: Place all the plantain slices into a medium mixing bowl. Drizzle with 1/2 tablespoon of avocado oil. Toss the slices gently but thoroughly until every slice is lightly coated with oil. This step ensures that the chips develop a golden, slightly crispy texture without becoming greasy.
- Arrange on Baking Tray: Spread the plantain slices in a single layer on the prepared parchment-lined baking tray. Avoid overlapping slices, as this can cause uneven baking and prevent them from becoming fully crispy. Take a moment to arrange them neatly—presentation counts and it also affects the final texture.
- Season with Sea Salt: Sprinkle sea salt evenly over the plantain slices according to your taste. The salt enhances the natural sweetness of the plantain and adds that signature savory crunch. You can also experiment with other seasonings, such as smoked paprika, garlic powder, or a touch of chili powder for extra flavor.
- Bake the Plantain Chips: Place the tray in the preheated oven and bake for 15-20 minutes. About halfway through, rotate the tray 180° for even browning. Keep a close eye on the chips, as thin slices can quickly go from golden to burnt. The chips are done when the edges turn a light golden brown and they feel crisp to the touch.
- Cool and Crisp: Once baked, remove the tray from the oven and allow the plantain chips to cool for 5-10 minutes on the tray. As they cool, they will firm up and develop maximum crispiness. If stored immediately while warm, they may become slightly soft.
- Serve or Store: Transfer the cooled plantain chips to a serving bowl or an airtight container. Enjoy them immediately as a crunchy snack, or store them for up to 3 days at room temperature in a sealed container to maintain crispiness.
Notes
- For best results, always use firm, green plantains—they yield the crispiest chips.
- Thin, even slices are key; a mandoline is highly recommended for uniformity.
- Tossing slices lightly with oil ensures even baking without greasiness.
- Keep a close eye during baking, as chips can quickly over-brown.
- Experiment with seasoning—sea salt works beautifully, but smoked paprika, chili powder, or garlic powder add extra flavor.
- Allow chips to cool completely before storing; this preserves crispness.
