
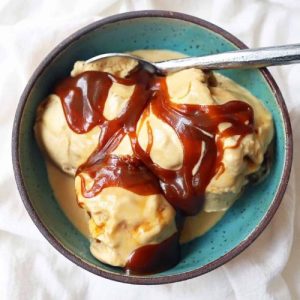
Indulge in the ultimate balance of sweet and salty with this homemade salted caramel ice cream.
Creamy and rich, it’s crafted with wholesome ingredients like full-fat milk and heavy cream for good fats and a satisfying texture.
Quick to prepare and perfect for everyday treats, it delivers a luxurious dessert experience without the store-bought additives.
Salted Caramel Ice Cream
Equipment
- 1 ice cream maker
- 1 heavy-bottomed saucepan
- 1 wooden spoon
- 1 Whisk
- 1 Mixing bowl
- 1 freezer-safe container
Ingredients
- ¼ teaspoon lemon juice
- 1 ½ cups granulated sugar
- 1 tablespoon unsalted butter
- 3 cups heavy cream
- 1 cup whole milk
- 1 teaspoon sea salt
Instructions
- Prepare the Sugar for Caramel: Start by placing a heavy-bottomed saucepan over medium-high heat. Pour in the granulated sugar and add the lemon juice. The lemon juice helps prevent the sugar from crystallizing. Add the sugar gradually, about 1/2 cup at a time, stirring continuously with a wooden spoon. Be patient and allow each addition to fully dissolve before adding more. The sugar will begin to melt and turn a golden amber color.
- Melt the Butter into Caramel: Once the sugar is completely dissolved and has a rich, golden-brown hue, carefully stir in the butter using a whisk. Be cautious during this step, as the caramel is extremely hot and may bubble or splatter. Whisk until the butter is fully incorporated and the mixture is smooth, creating a rich, velvety caramel base.
- Incorporate the Cream and Milk: Reduce the heat to medium-low to avoid burning the caramel. Slowly pour in the heavy cream and whole milk, whisking constantly to combine. Introduce the liquids gradually to prevent sudden splattering and to ensure a smooth texture. Continue whisking until the mixture is uniform, silky, and slightly thickened. This forms the luxurious ice cream base.
- Chill the Caramel Base: Once fully combined, remove the saucepan from the heat. Pour the warm caramel mixture into a mixing bowl. Cover the bowl with plastic wrap or a lid, and place it in the refrigerator to chill for 1 to 2 hours. Chilling is essential for proper ice cream texture and helps the flavors meld beautifully.
- Add the Sea Salt: After the mixture has chilled completely, remove it from the refrigerator. Stir in the teaspoon of sea salt evenly. The salt enhances the sweetness of the caramel and adds depth to the flavor, giving the ice cream its signature salted caramel taste.
- Prepare the Ice Cream Maker: Set up your ice cream maker according to the manufacturer’s instructions. Ensure the bowl is properly frozen if required and that all components are clean and ready. Pour the chilled caramel mixture into the ice cream maker, making sure not to overfill.
- Churn the Ice Cream: Turn on the ice cream maker and allow it to churn the mixture according to the machine’s guidelines, usually about 20–30 minutes. During churning, the mixture will thicken and transform into creamy, smooth ice cream. Check occasionally to ensure proper consistency and scrape down the sides if needed.
- Transfer to Freezer-Safe Container: Once the ice cream reaches soft-serve consistency, carefully transfer it into a freezer-safe container. Use a spatula to smooth the top, ensuring even freezing and easy scooping later.
- Freeze Until Firm: Cover the container tightly with a lid or plastic wrap to prevent ice crystals from forming. Place the container in the freezer for at least 4 hours to allow the ice cream to fully firm up. For the best texture and flavor, freezing overnight is recommended.
- Serve and Enjoy: Before serving, allow the ice cream to sit at room temperature for 5–10 minutes for easier scooping. Use an ice cream scooper to create perfectly rounded servings. Garnish with a sprinkle of extra sea salt or a drizzle of caramel sauce if desired, and enjoy the creamy, perfectly balanced salted caramel ice cream with friends and family.
Notes
- For best results, use a heavy-bottomed saucepan to prevent the sugar from burning while making caramel.
- Always add sugar gradually and stir constantly to ensure smooth, lump-free caramel.
- Use full-fat heavy cream and whole milk for a rich, creamy texture.
- Chill the mixture thoroughly before churning; this improves ice cream texture and helps it freeze evenly.
- Sea salt is key: adjust the salt to taste for your perfect sweet-salty balance.
- Allow ice cream to soften slightly at room temperature before scooping for easy serving.
Chef’s Secrets: Perfect Caramel Every Time
The key to silky, luscious salted caramel ice cream lies in patience and technique.
Start by slowly melting the sugar over medium-high heat, adding it in increments, and stirring continuously.
This prevents crystallization and ensures a smooth, golden caramel.
When adding the butter and cream, do so gradually to avoid splattering.
Using high-quality sea salt enhances the flavor, balancing sweetness without overpowering it.
Finally, chilling the base thoroughly before churning guarantees creamy, scoopable perfection.
Serving Suggestions: Delicious Pairing Ideas
Serve this salted caramel ice cream in a waffle cone, a crisp bowl, or alongside warm desserts like apple pie or brownies.
A drizzle of extra caramel sauce, a sprinkling of toasted nuts, or a few dark chocolate shavings can elevate the presentation and flavor.
For a grown-up twist, pair a scoop with a shot of espresso or a splash of bourbon for a sophisticated dessert experience.
Storage Tips: Keep Ice Cream Fresh
Store the ice cream in a tightly sealed, freezer-safe container to prevent ice crystals and maintain its creamy texture.
For best consistency, place a piece of plastic wrap directly on the surface before sealing.
Keep the ice cream in the coldest part of the freezer and avoid frequent temperature changes, which can cause it to harden unevenly.
Properly stored, it will stay fresh for up to 2 weeks, though it’s best enjoyed within the first week for peak flavor.
Frequently Asked Questions
1. Can I make this ice cream without an ice cream maker?
Yes! You can pour the chilled caramel mixture into a shallow, freezer-safe pan and stir every 30 minutes for 3–4 hours to break up ice crystals. While it won’t be as smooth as machine-churned, it will still be delicious.
2. Can I use alternative milk or cream?
Full-fat dairy gives the best creamy texture, but you can substitute coconut cream and oat milk for a dairy-free version. Keep in mind the flavor and texture may vary slightly.
3. How do I prevent the caramel from crystallizing?
Always add sugar gradually and stir constantly over medium heat. Avoid adding sugar all at once, and make sure your utensils are clean and dry. A small splash of lemon juice also helps prevent crystallization.
4. Can I adjust the sweetness or saltiness?
Absolutely! Taste the base after adding the salt and adjust to your preference. A pinch more salt enhances the flavor, while a touch more sugar can balance it if needed.
5. How do I achieve a soft, scoopable ice cream?
Allow the ice cream to sit at room temperature for 5–10 minutes before scooping. For even creamier texture, serve it after it’s been churned and slightly softened in the fridge for a few minutes.