
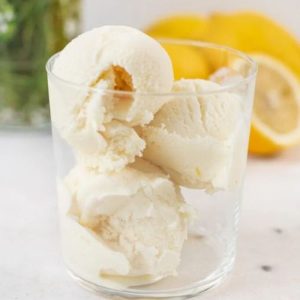
Bright, zesty, and herb-kissed, this Lemon Thyme Ice Cream is a refreshing treat perfect for warm days.
Infused with fresh thyme and a touch of lemon, it’s naturally aromatic and indulgent without being overly heavy.
Made with wholesome dairy, it provides protein and healthy fats, making it a satisfying dessert that’s quick to prep and ideal for everyday enjoyment.
Creamy Lemon Thyme Ice Cream
Equipment
- 4-quart saucepan
- Mixing bowl
- Whisk
- Airtight container
- Ice cream maker
Ingredients
- 2 cups whole milk
- 2 tbsp whole milk reserved
- 1 ¼ cups heavy cream
- ¾ cup granulated sugar
- 2 tbsp light corn syrup
- 1 tsp kosher salt
- 1 ½ tbsp cornstarch
- ¼ tsp lemon oil
- ¾ tsp vanilla extract
- 1 tbsp lemon zest about 1 lemon
- 2 small sprigs fresh thyme
Instructions
- Prepare the Creamy Base: Start by combining the main dairy ingredients in a 4-quart saucepan. Pour in 2 cups of whole milk and 1 ¼ cups of heavy cream. Add ¾ cup granulated sugar, 2 tablespoons light corn syrup, and 1 teaspoon kosher salt. Using a whisk, gently stir the mixture to dissolve the sugar and evenly distribute the salt and corn syrup. Place the saucepan over medium heat, allowing the mixture to slowly warm while stirring occasionally to prevent any milk from scorching at the bottom.
- Mix the Cornstarch Slurry: While the milk mixture is heating, prepare the thickening agent to ensure a smooth, creamy texture. In a small bowl, combine the reserved 2 tablespoons of whole milk with 1 ½ tablespoons of cornstarch. Whisk thoroughly until you achieve a smooth, lump-free slurry. Set this aside for later incorporation. This step ensures your ice cream base thickens evenly without forming clumps.
- Bring to a Rolling Boil: Once the milk and cream mixture is warmed and all sugar has dissolved, increase the heat slightly and bring it to a gentle rolling boil. A rolling boil is when the liquid bubbles vigorously across the entire surface. Maintain this boil for 1 full minute. This initial boiling step is critical for flavor development and ensures the base will thicken properly once the cornstarch is added.
- Incorporate the Cornstarch Slurry: After boiling, remove the saucepan from heat briefly and slowly whisk in the prepared cornstarch slurry. Pour the slurry gradually while continuously whisking to prevent lumps from forming. Once fully combined, return the saucepan to medium heat and bring the mixture back to a rolling boil. It’s essential that the mixture reaches this boiling point again, as this fully activates the cornstarch, giving the ice cream its signature creamy texture.
- Add Flavorings and Herbs: Remove the saucepan from heat and immediately add the aromatic and flavor-rich ingredients: ¼ teaspoon lemon oil, ¾ teaspoon vanilla extract, and 1 tablespoon freshly grated lemon zest. Add the 2 small sprigs of fresh thyme to infuse herbal notes throughout the base. Stir gently to combine, ensuring the flavors are evenly distributed without bruising the thyme leaves. Allow the mixture to steep for 20 minutes, letting the citrus and herbs fully infuse the creamy base.
- Remove Herbs and Chill: After steeping, carefully remove the thyme sprigs to prevent over-flavoring or bitterness. Pour the infused ice cream base into an airtight container. Cover tightly and place it in the refrigerator for 6–8 hours, or until thoroughly chilled. Chilling the base at this stage enhances flavor melding and prepares it for smooth, consistent churning. The base can also be stored in the refrigerator for up to 48 hours before churning if needed.
- Churn the Ice Cream: Once fully chilled, follow your ice cream maker’s instructions to churn the base. Pour the mixture into the machine and set it to churn for approximately 25 minutes. During this process, the machine incorporates air into the ice cream, creating a soft, creamy texture while maintaining the bright, zesty flavors of lemon and thyme.
- Serve or Freeze for Firm Texture: Enjoy the freshly churned ice cream immediately as a soft-serve dessert, delightfully creamy and ready to savor. For a firmer texture suitable for scooping, transfer the ice cream to an airtight container and freeze for an additional 4–6 hours. This final freeze allows the ice cream to set fully while preserving its delicate citrus-herb flavor.
- Presentation and Tips: Serve in small bowls or cones, garnished with a few fresh thyme leaves or a light sprinkle of lemon zest for visual appeal and an extra aroma boost. This ice cream is perfect for summer entertaining, special desserts, or a refreshing everyday treat. For best results, avoid leaving it at room temperature for too long before serving, as it will soften quickly due to its creamy base.
Notes
- Use fresh thyme for the best herbal flavor; dried thyme can be too strong and overpower the lemon.
- Lemon zest adds brightness, so make sure to avoid the white pith, which can be bitter.
- Cornstarch is essential for a smooth, creamy texture; do not skip it.
- Chill the ice cream base thoroughly before churning to ensure proper consistency and prevent ice crystals.
- Lemon oil is optional but enhances the citrus aroma; adjust according to your taste preference.
- Soft-serve is delightful immediately after churning, but freezing longer will give you scoopable ice cream.
Chef’s Secrets: Expert Tips For Success
To make this ice cream truly shine, attention to technique is key.
Always whisk the sugar and cream mixture carefully over medium heat to prevent scorching, and ensure the cornstarch slurry is fully smooth before adding.
Steeping the thyme for the full 20 minutes allows the herb to subtly infuse the base without becoming overpowering.
For maximum citrus punch, use fresh lemon zest combined with lemon oil.
If you want a lighter texture, slightly increase the whipping of the cream before heating, which adds airiness without affecting flavor.
Serving Suggestions: Creative Ways To Enjoy
This lemon thyme ice cream pairs beautifully with light, summery desserts.
Serve alongside fresh berries, a drizzle of honey, or a crisp shortbread cookie for a sophisticated dessert plate.
For a more decadent experience, try topping with a lemon glaze or a sprinkle of candied lemon peel.
It also works wonderfully as a palate cleanser between courses or as a refreshing addition to fruit salads.
Soft-serve style is perfect for an informal gathering, while scooped and plated looks elegant for special occasions.
Storage Tips: Keep Ice Cream Fresh
Store your ice cream in an airtight container to prevent freezer burn and preserve its delicate citrus-herb flavor.
For best texture, place a sheet of parchment paper directly on the surface before sealing the container.
Homemade ice cream is best enjoyed within one week, although it can last up to two weeks in the freezer.
Avoid repeated thawing and refreezing, as this will lead to ice crystals and a grainy texture.
Let ice cream sit at room temperature for 5–10 minutes before scooping to soften slightly.
Frequently Asked Questions
1. Can I use dried thyme instead of fresh?
While dried thyme is stronger, you can use a small amount (about ½ teaspoon) but steep it less time. Fresh thyme provides a brighter, more delicate herbal note.
2. Can I make this ice cream without lemon oil?
Yes, the lemon zest provides a bright flavor, but lemon oil enhances aroma and intensity. If omitted, consider adding a bit more zest or a teaspoon of fresh lemon juice.
3. How do I prevent ice crystals in homemade ice cream?
Chill the base completely before churning, and use cornstarch as a stabilizer. Storing in an airtight container with parchment on top also helps maintain smooth texture.
4. Can I make this recipe vegan or dairy-free?
Yes, substitute full-fat coconut milk or a plant-based cream alternative for the milk and heavy cream. The flavor will remain citrusy, but texture may be slightly different.
5. How long does this ice cream last in the freezer?
For the best taste and texture, consume within one week. It can last up to two weeks, but extended storage may slightly dull the fresh lemon and thyme flavors.