
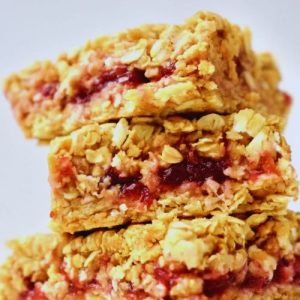
These no-bake Peanut Butter Jelly Oat Bars are a quick, satisfying snack that hits all the right notes.
Packed with plant-based protein from peanut butter and fiber-rich oats, they provide lasting energy while keeping saturated fat low.
Naturally sweetened with maple syrup and layered with your favorite jam, these bars are perfect for a grab-and-go breakfast, afternoon snack, or easy meal prep for the week.
Peanut Butter Jelly Oat Bars
Equipment
- 1 × 18 cm (7-inch) square pan
- Parchment paper (for lining pan)
- 1 Large mixing bowl
- Spoon or spatula
- Hands (for pressing mixture)
Ingredients
- 3 cups 240 g rolled oats
- 4 tbsp maple syrup
- ¾ cup 180 g natural peanut butter
- ½ cup 160 g jam (any flavor, not too runny)
Instructions
- Prepare Your Pan: Start by selecting an 18 cm (7-inch) square pan for your bars. If you have a silicone pan, that works perfectly, but a metal baking tin will also do. Line the bottom and sides with parchment paper, leaving a little overhang on the edges. This will make removing the bars easier later and prevent sticking. Make sure the parchment lies flat, with no wrinkles, so your bars will have smooth edges.
- Mix the Dry and Wet Ingredients: In a large mixing bowl, combine the oats, peanut butter, and maple syrup. Use a spoon or spatula to fold the ingredients together thoroughly. Depending on the type of peanut butter you are using, your mixture might feel slightly dry or crumbly. If it’s not holding together when pressed, gradually add an extra teaspoon of peanut butter or a splash more maple syrup until the mixture is soft and sticky enough to press without falling apart.
- Form the Bottom Layer: Spoon slightly less than half of your oat mixture into the prepared pan. Use your hands (or a flat spatula) to press the mixture firmly and evenly across the base. This layer should be compact to support the jam layer that will go on top. Take your time pressing it down firmly so the bars will hold together nicely after chilling.
- Add the Jam Layer: Once the bottom layer is even, spread your jam carefully over it. Use a spoon or small spatula to create a thin, even layer, covering the oats completely. Avoid spreading too thickly, as this can make the bars difficult to slice later. The jam layer acts as a sweet, flavorful center that balances the nutty base and top layers.
- Top with Remaining Oat Mixture: Spoon the remaining oat mixture over the jam layer. Start by gently sprinkling it evenly over the surface, making sure not to disturb the jam underneath. Then, carefully press the mixture down with your hands so it fully covers the jam. Start lightly to avoid squeezing jam out the sides, and once covered, press more firmly to compact the top layer. This ensures the bars hold their shape when cut.
- Chill and Set: Place the pan in the refrigerator for at least one hour. Chilling allows the peanut butter and maple syrup to firm up, making the bars easier to slice. If you prefer firmer bars, you can leave them in the fridge for up to 2 hours. Do not skip this step—cutting too early will result in crumbly bars that fall apart.
- Remove and Slice: Once the bars have set, use the parchment overhang to carefully lift them out of the pan. Place the block on a cutting board and, using a sharp knife, cut into 16 equal pieces. For cleaner cuts, wipe the knife with a damp cloth between slices. You can make smaller or larger bars depending on your preference.
- Serve or Store: Your Peanut Butter Jelly Oat Bars are ready to enjoy immediately! They make a perfect grab-and-go snack or quick breakfast. To store, place them in an airtight container in the refrigerator for up to a week, or freeze for longer storage. You can even separate layers with parchment paper to prevent sticking if storing multiple layers together.
Notes
- Oat Choices Matter: You can use jumbo rolled oats, quick oats, or even instant oats. Larger oats give a slightly crunchier texture, while smaller oats create a chewier bite. The choice affects texture, but not flavor.
- Adjust Sweetness: Maple syrup can be adjusted to taste. For a sweeter bar, add an extra teaspoon or two, or reduce for a less sugary snack.
- Peanut Butter Consistency: Some natural peanut butters are thicker or drier than others. If the mixture feels crumbly, add a bit more peanut butter or syrup until it sticks together easily.
- Jam Selection: Use your favorite jam, but avoid very runny types, which can make the bars soggy. Homemade chia jam works beautifully as a healthy alternative.
- Pressing Is Key: Firmly pressing each layer ensures bars hold together. Don’t skip the chilling step—it’s crucial for neat, sliceable bars.
Chef’s Secrets For Perfect Bars
To elevate your oat bars, start with high-quality natural peanut butter; it provides a rich, creamy flavor and smooth texture.
If you want extra nutrition, consider stirring in a teaspoon of chia seeds or ground flaxseed for a subtle boost of omega-3s and fiber.
When layering, take your time pressing the mixture evenly; a gentle hand first, followed by a firmer press, prevents the jam from oozing and keeps the bars intact.
For cleaner slices, slightly warm the knife under hot water before cutting—this ensures smooth, even edges without crumbling.
Serving Suggestions And Pairing Ideas
These Peanut Butter Jelly Oat Bars are versatile and convenient for any occasion.
Serve them as a quick breakfast with a glass of plant-based milk, or pair with a cup of coffee or tea for an afternoon snack.
They also make a kid-friendly lunchbox treat or a post-workout energy boost thanks to their combination of protein, good fats, and complex carbs.
For extra indulgence, drizzle a thin layer of melted dark chocolate on top or sprinkle with crushed nuts for a textural contrast.
Storage Tips To Keep Fresh
To maintain freshness, store the bars in an airtight container in the refrigerator for up to a week.
For longer storage, freeze them individually or in layers separated by parchment paper for up to two months.
When ready to enjoy, thaw at room temperature or in the fridge.
Avoid leaving bars at room temperature for extended periods, especially if using softer jams, as this can make them sticky or slightly messy.
Frequently Asked Questions
1. Can I use other nut butters?
Yes! Almond butter, cashew butter, or sunflower seed butter work well. Keep in mind that different nut butters vary in consistency, so you may need slightly more or less to get the right texture.
2. Can I make this recipe sugar-free?
Absolutely. Use a sugar-free jam or homemade chia jam sweetened naturally with dates or stevia. Maple syrup adds natural sweetness, but you can adjust it or use a sugar-free syrup alternative.
3. Will the bars hold together without refrigeration?
Chilling is highly recommended. The peanut butter and maple syrup need time to firm up; skipping refrigeration can result in crumbly bars that fall apart when sliced.
4. Can I make the bars gluten-free?
Yes! Ensure you use certified gluten-free oats if you have dietary restrictions. All other ingredients are naturally gluten-free.
5. Can I double the recipe?
Definitely. Use a larger pan or prepare in two batches. Just maintain the layering process—bottom oat layer, jam, and top oat layer—to keep the bars structured and easy to slice.